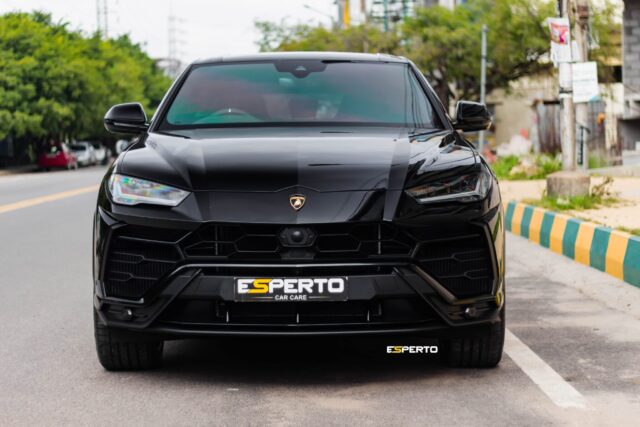
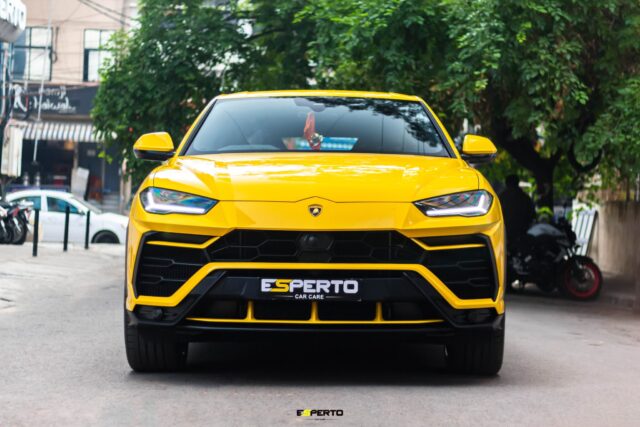
Are you considering refreshing your car’s style but uncertain about where to proceed? Many vehicle owners face this quandary, desiring a fresh look for their vehicle without the price tag or permanence of a new paint job.
Car wraps provide a captivating solution, enhancing your car’s visuals while also preserving the vehicle’s finish. Whether you want gloss, matte, or custom graphics, vinyl wraps can meet your design preferences while protecting the original paint underneath.
Here’s an intriguing point: vinyl wrap installations could turn into a DIY guide project if the right tools and techniques are employed. This article offers guidance on how to apply car wraps on your vehicle, from surface preparation to smooth film application. It’s ideal even for those trying it for the first time.
Begin by cleaning the car thoroughly, then gently lay the vinyl wrap over the panel. Use a heat gun to make the film pliable and a squeegee to remove any bubbles. Carefully cut the wrap to the correct length for each section, and decide whether to tackle large or small areas first.
What is a Car Wrap, and Why Should You Consider It?
A car wrap is a way to give your vehicle a new look without permanent changes. This process involves covering the exterior of a car with large vinyl sheets, which can be metallic lava red or have air-release channels to prevent bubbles.
Wraps protect the paint beneath from scratches and sun exposure, making them an excellent choice for maintaining your vehicle’s appearance.
Car enthusiasts and owners opt for wrapping because it offers a chance at customization that doesn’t affect the original paint job. The cost implications suggest wraps are often more affordable than a complete repaint, especially when considering high-quality vinyl can shield against environmental damages like direct sunlight or minor abrasions.
With options ranging from tinting tail lights to full-body transformations, vinyl wraps mix style with practical benefits, creating tension between old and new appearances effortlessly.
Understanding the Basics of Vinyl Wrap
A vinyl car wrap is a great solution for those who wish to give their vehicle a fresh aesthetic without making a permanent change with a paint job. Essentially, this method involves professionals, such as Esperto Car Care, who apply a thin film over the car, bike, or any other vehicle.
The film has the power to transform the look while providing a degree of protection against minor scuffs and UV damage. Types of vinyl wraps vary in finish, durability, and flexibility, with cast vinyl being a favoured option due to its resilient nature and its ability to cover curved surfaces with lasting colour retention. For anyone interested in a quick vehicle makeover, this wrap install method is both practical and effective.
Putting up vinyl wrap involves several important steps, such as cleaning the vehicle using specific items like car wash soap and isopropyl alcohol. Before starting, gather all the necessary supplies—a utility knife, heat gun, felt-edged squeegee, and gloves—to streamline the process.
Proficient installers use tools like squeegees to eliminate air bubbles and secure the wrap tightly. Keeping the vinyl taut during installation is important to avoid errors. When covering detailed areas such as door panels or hood ornaments, accurate cuts determine whether the finish looks professional or not.
Remember, the film can be repositioned during application, allowing corrections without leaving residue. For example, if you’re not happy with how a piece sits, heating and adjusting it is easy.
If you’re just starting, take the time to collect the right gear and understand each step. That’s what separates a flawless wrap from a rushed job.
Advantages of Using a Vehicle Wrap Over a Traditional Paint Job
Vehicle wraps offer a significant benefit of adaptability in contrast to conventional paint jobs. You have numerous designs at your disposal, such as metallic lava red vinyl or tinted tail lights, that will provide your automobile with a distinct appeal. If you’re learning how to apply car wrap film, it’s essential to follow proper techniques from surface prep to finishing.
This method allows you to effortlessly alter your car’s look without confining yourself to a permanent paint job. Wraps safeguard the underlying paint, maintaining the car’s worth and attractiveness for potential purchasers.
Installing vinyl wrap is usually more economical than a complete repaint. The process is swifter and doesn’t necessitate extensive labour or materials as painting does. Using microfiber towels and an appropriate cleaning solution is critical for prep before application. Ensure you’re working at the correct temperature, and always keep your heat gun moving to avoid damaging the material.
If the wrap incurs damage, the repair entails merely swapping the affected segment rather than repainting an entire panel or more. When needed, you can carefully remove the damaged portion or even remove the vinyl wrap completely without harming the paint beneath, provided you’ve used extra material during installation.
Opting for professional installation ensures a sleek, long-lasting result, but DIY methods can also yield excellent outcomes with the right tools and knowledge.
Cost Implications: Is It Worth Wrapping Your Car?
Transitioning from the discussion on the benefits of opting for a vehicle wrap over traditional paint jobs, addressing the financial aspect of this choice is crucial. Choosing to wrap your car involves considering both the up-front overall cost and the potential savings over time. While the one piece vinyl method is often preferred for a sleek, seamless look, it’s important to plan carefully, leaving extra material during installation to accommodate curves and edges without compromising the finish.
| Aspect | Details |
| Initial Cost | Average car wrap costs range between $2,500 to $5,000, depending on vehicle size and wrap design. |
| Cost Vs. Paint | Traditional high-quality paint jobs can cost upwards of $10,000, making wraps a cost-effective alternative. |
| Longevity | Quality wraps last about 5 to 7 years, potentially outliving cheaper paint jobs. |
| Maintenance | Wraps require less maintenance than paint, needing only regular washing with soap and water. |
| Resale Value | Protecting the original paint can increase a vehicle’s resale value, which wraps provide by shielding the paint from damage. |
| Customization Cost | Changing a vehicle’s appearance is cheaper with wraps, allowing for more frequent updates or reversions to the original look without additional costs. |
| Repair Costs | Repairs on wraps are often simpler and cheaper than fixing a paint job, with the ability to replace just the affected panels. |
Considering these cost implications, wrapping your car can be a financially smart choice. It offers an affordable alternative to traditional paint jobs and additional benefits like protection and customization flexibility. This makes car wraps a compelling option for car owners aiming to enhance their vehicle’s look and preserve its value affordably.
How to Ready Your Vehicle for a Vinyl Wrap
Prepping your vehicle for a vinyl wrap is vital for a seamless installation process and top-notch outcomes. Proper prepping assures the vinyl adheres excellently and retains its look for prolonged durations.
- Purify your car meticulously using pre-installation cleaning commodities. Ensure total eradication of dirt, grease, and wax from the surface.
- Employ an alcohol-based purifier to swipe the entire surface. This step eradicates any remainders that routine cleaning might overlook.
- Examine the surface closely for profound scratches or dents. Mend these flaws, as the vinyl will not conceal them.
- Gauge your car using a tape measure to ascertain the required amount of vinyl. Considering that having more is always more beneficial than having scarce,
- Snip the vinyl into sections as per your measurements. Use a sharp cutting tool and ensure cuts are neat and exact.
- Confirm the fit of each piece of vinyl on the car before peeling off the backing paper. This ascertains each piece aligns appropriately without any stretch.
- Accord has a distinctive concentration in sharp edge corners and regions where excess vinyl might mount up. Strategize how you will tackle these spots during the application.
- Ascertain the vehicle’s temperature consistency, ideally between 60°F-75°F (15°C-24°C). Vinyl functions differently under various temperatures.
- Compile all tools needed for the installation: lint-free towels, a heat gun, squeegees, masking tape, and cotton gloves.
- Set up a sanitary workspace devoid of dust and debris to prevent the adhesive side of the vinyl from contamination.
Following these steps creates ideal conditions for wrapping your vehicle, significantly minimizing risks like air trapped beneath the film or poorly sealed edges that could undermine durability and aesthetics.
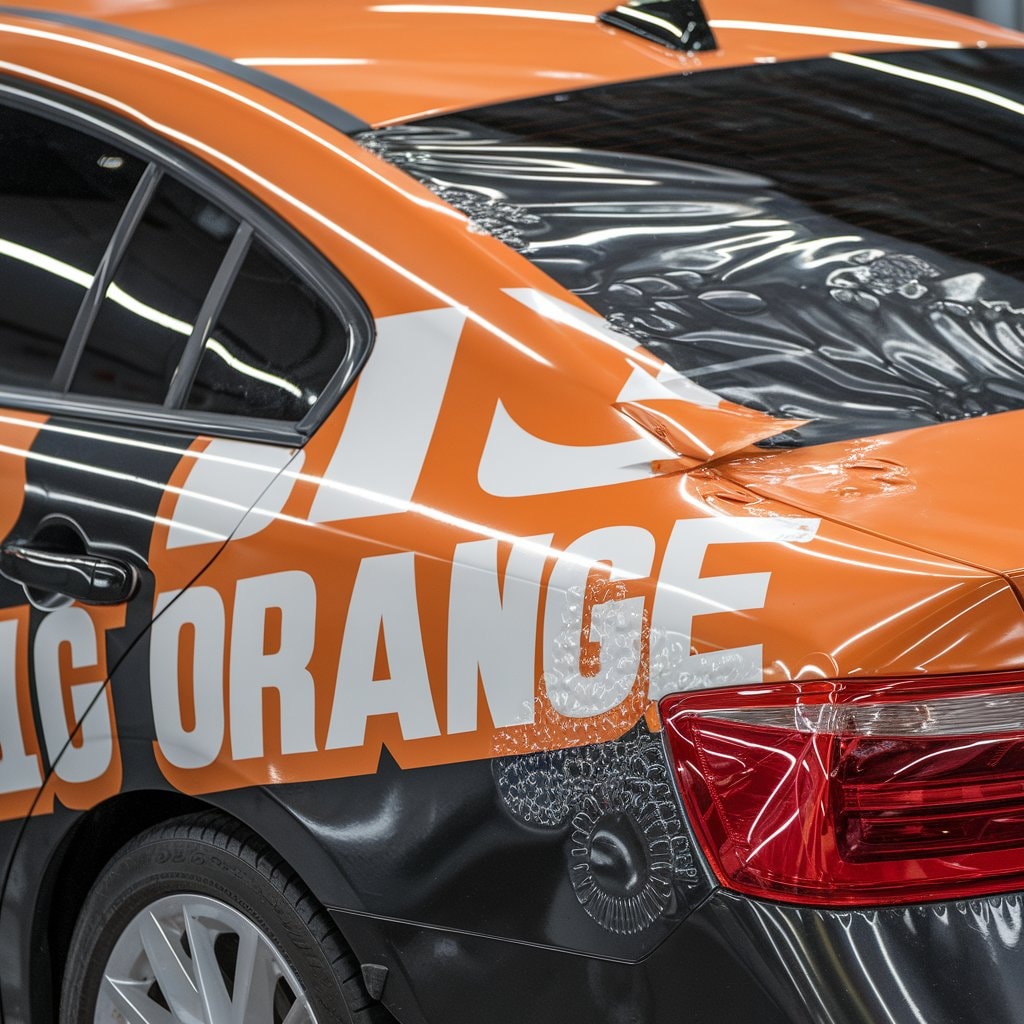
Cleaning: What Products to Use and Avoid
Cleaning your vehicle correctly is crucial before installing a vinyl wrap. For a first timer, it’s a good idea to plan the rest of the process. Using the right spray products ensures that the vinyl adheres properly and lasts longer. Focus on cleaning glass surfaces as well since dirt can affect how well the vinyl sticks. After cleaning, let the vehicle dry completely—especially in hot conditions—before using cutting tape to outline the wrap edges. When applying, use the squeegee to smooth out the vinyl, helping it shrink and conform to curves for a clean finish.
- Start with a thorough wash using a paint-safe grease remover. This step removes any oily residue that can prevent vinyl from sticking correctly.
- Dry the surface completely with clean, lint-free towels. Moisture can ruin the wrap’s adhesion, so ensure every drop of water is gone.
- Apply alcohol-based cleaners sparingly to wipe down the surface beneath where you will apply the film. These cleaners evaporate quickly, leaving a clean area for wrapping.
- Avoid using any abrasive cleaning tools or solutions that could scratch your car’s paint. Scratches can show through the wrap.
- Steer clear of waxy or oily pre-installation cleaning products as they risk leaving air trapped under the vinyl.
- Use a lint-free cloth for the final touches to avoid dust particles from sticking to the adhesive side of the vinyl.
- Measure and cut your vinyl accurately using a sharp blade for precise surface and detailed cuts without damaging the paint underneath.
Choosing suitable cleaning products and methods prepares your vehicle for a successful wrap installation, ensuring it looks great and avoids damage in the process.
Inspecting the Surface: Identifying and Fixing Imperfections
Inspecting the vehicle’s surface before applying a car wrap is crucial. This step guarantees proper adhesion of the vinyl and looks flawless once installed. Here are key steps to follow:
- Wash your car thoroughly to eliminate all dirt and debris. Use pre-installation cleaning products designed not to leave a residue.
- Dry the vehicle completely with a clean, lint-free towel.
- The presence of moisture can cause issues during vinyl application.
- Look for any loose or floating material on the paint surface. Remove these particles with a lint-free cloth to avoid imperfections beneath the wrap.
- Examine the car for deep scratches and dents. Fill them in because vinyl will not hide significant damage.
- Use alcohol-based cleaners on areas with stubborn grime. These cleaners evaporate quickly, leaving no residue.
- Measure each section of your car that you plan to wrap. Knowing the exact dimensions helps in cutting precise amounts of vinyl, minimizing waste.
- Cut the vinyl vertically when possible. This technique reduces tension, making the material easier to work with during application.
- Gently heat moderately curved surfaces to see how much heat they can withstand without damaging the paint underneath.
- Test small areas with a squeegee to ensure no air release channels are blocked. Blocked channels prevent air from escaping, leading to bubbles under the wrap.
- Hold up pieces of vinyl against the car before removing the paper liner. This step confirms size and orientation, reducing errors during installation.
Following these guidelines helps prepare your vehicle for a successful wrap installation, giving your car an impressive new look while avoiding common pitfalls.
Measuring and Cutting: Getting the Right Amount of Vinyl
After addressing surface imperfections, the next step focuses on measuring and cutting vinyl for a precise fit. This step is crucial for a successful car wrap installation. In this case, taking the right measurements can save hours of rework. Be sure to plan your run of each vinyl section carefully, and allow several minutes to double-check alignment before application.
- Clean your car thoroughly to ensure a smooth surface for accurate measurement. Use paint-safe grease and alcohol-based cleaners to remove any contaminants.
- Measure each section of your vehicle that you plan to wrap. Include extra inches in your measurements for complex curves and edges.
- Unroll the vinyl on a clean, flat surface larger than the area of your car you’re working on. This prevents dirt from sticking to the adhesive side.
- Mark the back of the vinyl with a lint-free paper towel under your hand to avoid smudging the lines.
- Use a utility knife with steady hands to cut the vinyl according to your measurements. Keep extra vinyl around the edges for adjustments.
- Check that each piece fits its designated section on the vehicle without stretching it. If it doesn’t fit, measure and cut a new piece.
- Store unused vinyl properly by rolling it up gently and keeping it in a consistent temperature area away from sunlight.
Following these steps ensures you have accurately measured and cut pieces of vinyl that are ready for application, reducing waste and potential mistakes during installation.
What Are the Steps in the Car Wrap Installation Process?
Transforming your vehicle’s look while safeguarding its paintwork is what you achieve when you apply a vinyl wrap. This process requires detailed actions to ensure a perfect finish without any bubbles or creases. If you’re wondering how to install car wrap, it begins with thorough surface cleaning, accurate measurements, and careful application using tools like squeegees and heat guns.
- Initially, clean your car using pre-installation cleaning products to remove any dirt or grime. Make sure the vehicle is thoroughly dry before moving forward.
- For finishing touches on the cleaning phase, use a lint-free cloth to prevent any particles from getting lodged under the vinyl.
- Accurate measurement of your car’s surfaces is required to cut the correct amount of vinyl, giving special attention to areas like the car roof for accurate application.
- Begin at the center when placing the vinyl on the desired surface, then gently extend it to the edges to avoid creases.
- Employ a heat gun to make the vinyl flexible, particularly around curved surfaces, which enables it to stretch without tearing.
- To avoid crow’s feet formation, pull gently on opposite sides of the applied vinyl on flat surfaces to create tension.
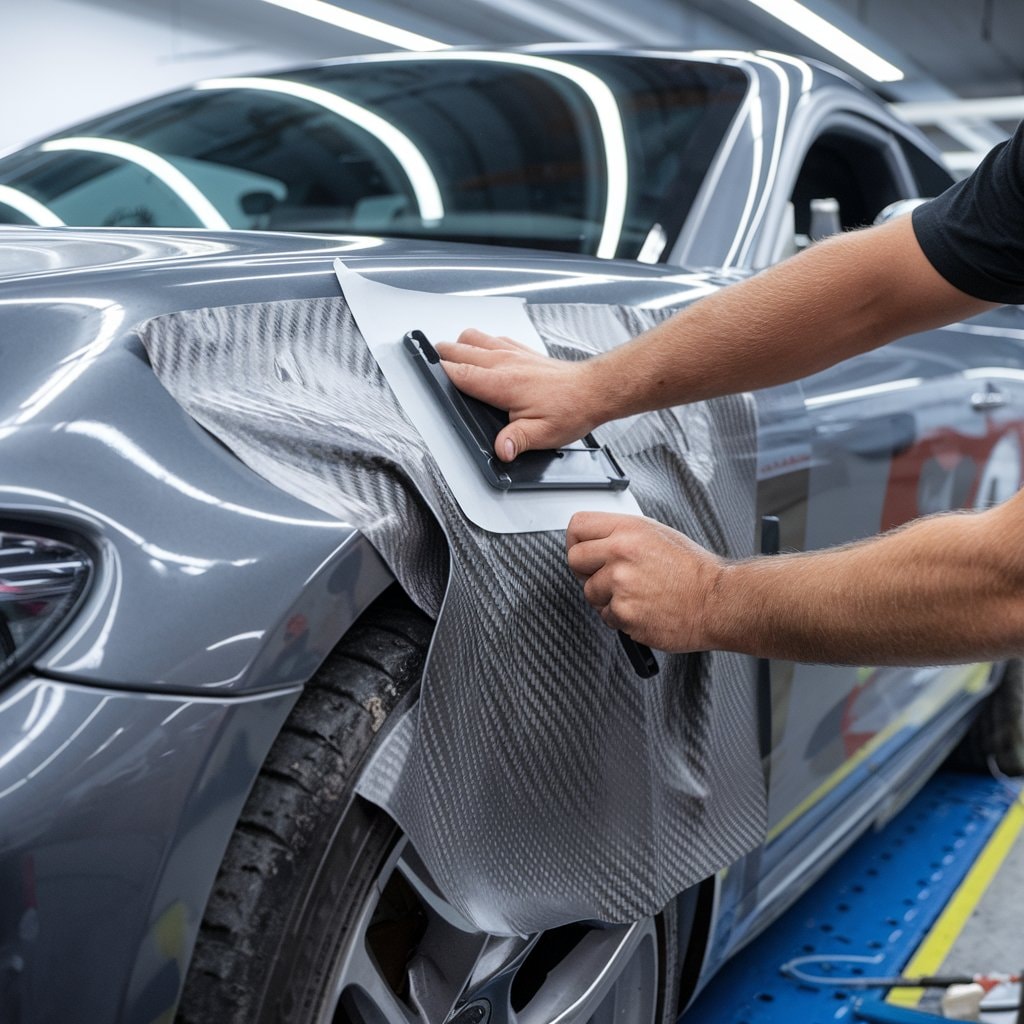
- Using a squeegee is key to removing air bubbles and affirming the vinyl’s firm adherence to every section of your car. The air release channels work method is beneficial for bubble-free results.
- If you notice any misalignment or wrinkles, repositioning the vinyl is crucial. Lift the vinyl gently and apply heat before stretching it till it fits perfectly again.
- Use a utility knife to trim surplus material, ensuring that deft hands operate near delicate parts like tinted tail lights, preventing any damage or lifting of installed surfaces.
- Once the installation is done, post-heating is essential. Gently apply heat over all wrapped areas, ensuring each section appears evenly smooth and flat.
- Wearing cotton gloves throughout the handling process can prevent fingerprints and aid in a smoother application by reducing friction between your hands and the film.
- For areas where objects protrude or recess into your car, it’s beneficial to understand how these objects interact with wrapping methods in advance to achieve superior results.
The careful and patient execution of these steps significantly influences the quality of the wrap your vehicle gets, catching your eyes as you drive and providing superior protection against daily wear and tear.
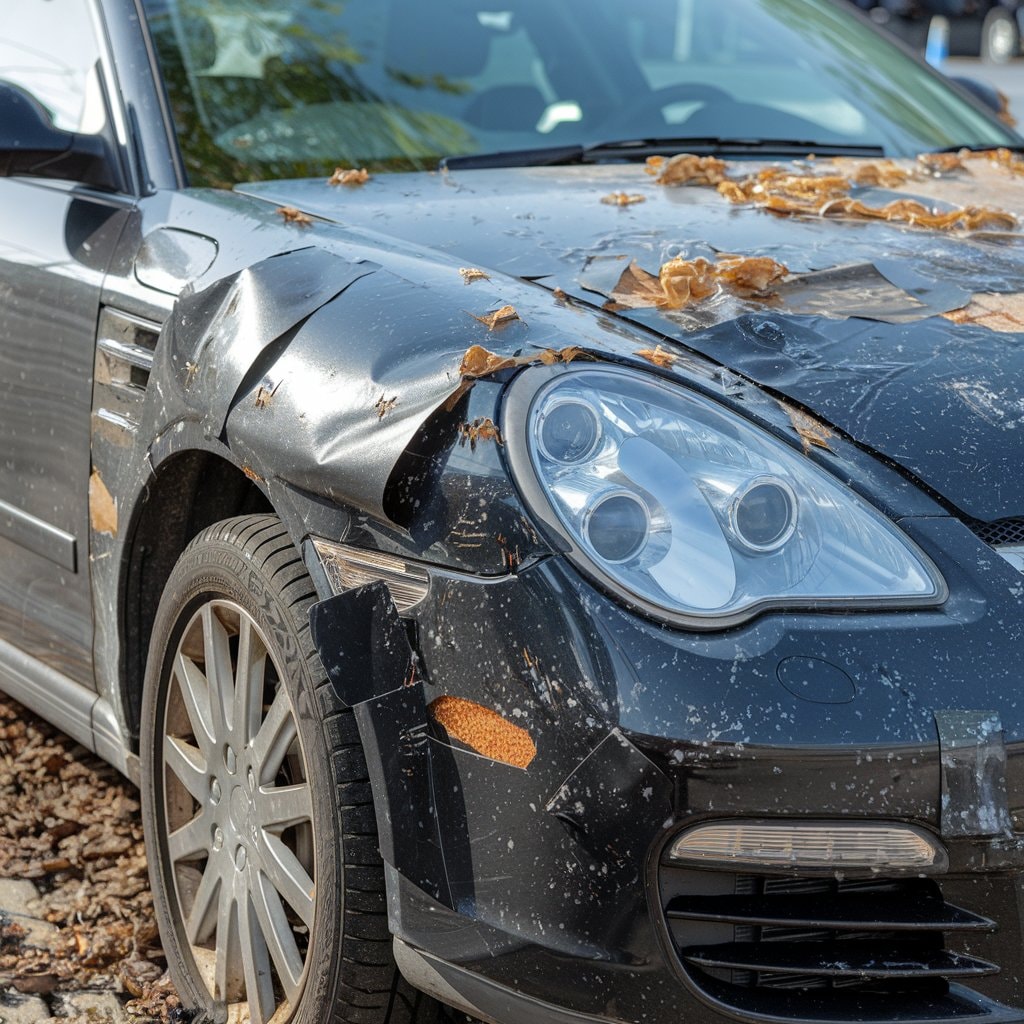
Laying the Vinyl and Aligning It Properly
Applying vinyl to a car requires precision and patience, with accurate alignment being key to a flawless appearance.
- Thoroughly clean your car’s surface with alcohol-based cleaners to ensure it’s fully dry, preventing any debris from getting trapped under the vinyl.
- Take accurate measurements of your vehicle before cutting the vinyl. If you cut too little, you might risk damaging the vinyl during the application process.
- Position the vinyl on the target area without discarding the backing paper. This step helps you visualize the final layout.
- Partially remove the backing paper to begin attaching the film, starting with flatter areas to avoid creases.
- Utilize a lint-free towel to press the vinyl down, commencing from the center and gradually working to the edges.
- Use a heat gun to apply heat to the vinyl until it becomes flexible, especially around contoured surfaces. Correctly stretching it will prevent any premature wear.
- After all the pieces have been applied, apply extra heat to ensure each edge is securely sealed, protecting against environmental factors.
- Use a squeegee to push out air bubbles and smooth out wrinkles, moving carefully from the center to the edges for an even finish.
- Cut off any surplus material with a utility knife. Having a steady hand is vital in order to protect your car’s paintwork.
- Finally, carefully check your work under bright lights to identify any flaws or misaligned edges that need adjusting.
Putting vinyl on a car requires practice, but adhering to these steps closely can help achieve a professional-grade vehicle wrap installation like an expert.
Applying Heat to Stretch the Vinyl Over Curved Surfaces
Once you have laid the vinyl and ensured it aligns properly on your vehicle, the next step involves stretching the vinyl over curved surfaces. This is where heat plays a crucial role in the installation process.
- Heat the vinyl until it is malleable with a heat gun. This makes the wrap more flexible and easier to stretch.
- Start in the middle of the area you’re working on and move outward. This helps prevent wrinkles and ensures a smooth application.
- Use very steady hands or seek someone with experience for this step. Applying vinyl takes practice.
- Hold the heat gun at least 5-7 inches away from the surface to avoid damage.
- Stretch the vinyl gently to fit over curves and indentations in your car’s body.
- Keep moving the heat gun in a back-and-forth. Staying in one spot too long might cause the vinyl to warp or burn.
- As you stretch, use a squeegee to press down the vinyl. This helps adhere it firmly and removes air bubbles.
- Post-heat sections that were stretched extensively. This helps set the wrap into its new shape.
- Check for any creases slowly transitioning into flatness as you apply heat and pressure.
- Letting crow’s feet eventually disappear is essential. Take your time smoothing out these small wrinkles near the edges.
Following these steps will help ensure that your car wrap looks professional, even around tricky curves and edges.
How to Handle Common Challenges in Vinyl Wrap Installation
Managing wrinkles in the process of vinyl installation can sometimes be a vexing experience for installers, especially beginners who may lack confidence. A heat gun can be used judiciously to activate the adhesive and soften the vinyl for a seam-free finish—just be careful not to overheat, which can make the material brittle or expensive to replace.
After heating, carefully extend the wrap to conform to the vehicle’s shape. This approach aids in wrinkle reduction and ensures the vinyl lays flat on all surfaces, even those with difficulty, like curves or grooves.
Another issue that requires careful handling and precision is air bubbles. A pristine, lint-free cloth or squeegee is the most suitable for sweeping air to the closest edge of the film, letting accumulated air escape easily. For relentless air bubbles, a fine needle can be used to pop them without causing any harm to the wrap.
For reference, insects or debris caught under the vinyl can also create unsightly bulges, so clean the surface thoroughly beforehand. It is also vital for a perfect finish to reposition vinyl without causing it any tears. Warm and pliable vinyl reduces the chances of damage while adjustments are made to its placement on the vehicle.
Warm and pliable vinyl reduces the chances of damage while adjustments are made to its placement on the vehicle.
Dealing with Wrinkles: Techniques for a Smooth Finish
Dealing with wrinkles in vinyl vehicle wraps is crucial for a smooth finish. Here are effective techniques to ensure a flawless application.
- Use a heat gun to carefully warm the vinyl. This makes it more flexible and easier to work with, especially over curved surfaces.
- Apply firm pressure with a squeegee. Move it over the vinyl in smooth, overlapping strokes to push out air and prevent wrinkles.
- Keep the vinyl taut while applying. Holding it tight helps lay the vinyl flat against the vehicle’s surface without creating wrinkles.
- Start from the center and work your way outward. This method pushes trapped air toward the edges, making it easier to eliminate.
- Reposition the vinyl carefully if needed. Lift it gently, apply heat, and smooth it back down to avoid the risk of tearing the vinyl.
- Cut away the excess material with a utility knife. Cutting away extra vinyl prevents bunching that can lead to wrinkles around edges and corners.
- Use alcohol-based cleaners for pre-installation cleaning products on the surface before starting. A clean surface ensures better adhesion and reduces imperfections.
- Address air bubbles immediately using an air-release tint tool or pinprick them carefully if they appear after installation.
- Practice patience throughout the process. Rushing increases the chance of mistakes and can cause wrinkles in the wrap film.
- Consult professional advice when you need clarification on certain areas or curves on your car that seem challenging to wrap smoothly.
By following these steps closely, car owners and enthusiasts can achieve that perfect wrinkle-free finish when wrapping their vehicles like a pro.
Addressing Air Bubbles: Tips to Ensure a Flawless Application
Air bubbles can compromise the clean appearance of a vinyl wrap on your vehicle. Here are suggestions to guarantee a perfect application and preserve the structure of your wrap pattern.
- Purify the surface with pre-installation cleaning products to eliminate any dirt or particles. Resort to alcohol-based cleaners for a flawless result.
- Position the film gently and attentively. Confirm that the vinyl lies flat on the car’s surface.
- Utilize a tidy lint-free towel or lint-free cloth to iron out the vinyl progressively, lessening the probability of air bubble creation.
- Gently warm with a heat gun to render the vinyl more adaptable. This assists it in moulding over curved structures without creasing.
- Apply ample pressure with a squeegee to force open air to the vinyl’s borders, eliminating any ensnared air bubbles beneath the film.
- If you locate an air bubble, perforate it with a tiny needle and apply pressure to let out the confined air. Execute this with utmost caution to prevent harm to the vinyl.
- Following the application of heat and usage of a squeegee, allow the vinyl to cool before you trim off surplus material. Employing a utility knife demands firm hands; abstain from hurrying at this stage.
- If sizable bubbles emerge, readjustment might be necessary. Gently lift and reposition that vinyl segment, ensuring that it does not overly pull or warp.
These procedures aid in preventing air bubbles during car wrap installation, bestowing your vehicle with a spotless, completed appearance.
Repositioning Vinyl Without Damaging It
Repositioning vinyl during the wrapping process requires care and precision. It ensures the vinyl appears flat and seamless across your vehicle’s surface.
- Heat gently – Applying low heat makes the vinyl more flexible. Use a heat gun from a safe distance to soften it without causing damage.
- Peel back slowly – If you need to reposition, peel the vinyl back carefully to avoid stretching or tearing.
- Use lint-free towels – A clean, lint-free towel or cloth can help smooth down the film as you reapply, preventing scratches.
- Keep it taut – Hold the vinyl taut during reapplication to prevent wrinkles and ensure a smooth surface.
- Work in sections – Tackle small areas at a time for better control and easier repositioning if mistakes occur.
- Check alignment often – Frequently step back to check that logos and wrap designs align correctly across the entire car.
- Employ squeegee techniques – Use a squeegee to press down the vinyl, starting from the center and moving outward to eliminate air pockets.
- Avoid sharp tools – When trimming excess vinyl, use a utility knife with very steady hands to cut cleanly without damaging the vehicle’s surface.
- Clean as you go – Regularly wipe down areas with pre-installation cleaning products like alcohol-based cleaners to remove any dust or debris that could get trapped.
- Practice patience – Rushing can lead to mistakes; take your time for precise placement and adjustment.
Following these steps helps protect your investment by ensuring that you can adjust and apply vinyl wraps without leaving marks or ruining materials, giving your car a professional-looking finish.
How to Maintain Your Vehicle Wrap for Longevity
Maintaining your vehicle wrap properly ensures its longevity and keeps your car looking fresh. Following these steps can help safeguard your investment and maintain the wrap’s vibrant appearance.
- Wash your wrapped vehicle regularly using pre-installation cleaning products that are safe for vinyl. This removes contaminants before they can cause damage.
- Employ a clean, lint-free towel for drying the vehicle to prevent water spots and avoid scratching the vinyl surface.
- Use alcohol-based cleaners carefully to tackle tough stains without harming the wrap vinyl.
- Protect the wrap from long-term sun exposure by storing your vehicle in a garage or under a cover when not in use.
- Avoid pressure washing at high intensity near the edges of the wrap to prevent lifting or peeling.
- Apply a silicone or Teflon-based polish designed for vehicle wraps to enhance shine and protect against minor scratches.
- Schedule regular inspections to detect and address any issues like lifting or peeling at edges, ensuring they don’t worsen over time.
- Be cautious when applying wax; ensure it’s safe for use on vinyl wraps and doesn’t contain petroleum distillates that can degrade the material.
- Hand washing is preferable; if you must use an automated car wash, choose one with soft brushes to minimize abrasion on the wrap.
- Treat tinted tail lights with special care during cleaning to avoid scratching or damaging the film.
Following these simple but effective maintenance steps will help keep your vehicle’s wrap looking as good as new, safeguarding both its aesthetic appeal and protective qualities over time.
Best Practices for Cleaning a Wrapped Car
Cleaning a wrapped car ensures its longevity and maintains its vibrant appearance. Use the appropriate products and techniques to avoid damaging the vinyl wrap.
- Start by rinsing your car with water to remove loose dirt and minimize scratching during washing.
- Pre-installation cleaning products designed for vehicle wrapping should be used to wash the surface. These are gentle on vinyl and effective in removing grime.
- Avoid using alcohol-based cleaners directly on the wrap, as they can degrade the vinyl over time.
- Apply a mild soap solution with a clean, lint-free towel or sponge in a circular motion. This technique lifts dirt without scratching the wrap.
- Rinse the vehicle thoroughly with clean water after washing to eliminate all soap residues.
- Dry your car immediately with another clean, lint-free towel or cloth to prevent water spots from forming on the vinyl.
- For tougher stains, lightly dampen a lint-free cloth with an approved cleaner and gently wipe the affected area. Do not scrub hard.
- Ensure you regularly clean exposed air and dirt trapped under edges to prevent peeling or lifting of the vinyl over time.
- Storing vinyl-wrapped vehicles in a garage protects them from environmental damages like sun fade, rain, and bird droppings that can stain or damage the wrap.
- Regularly inspect your wrap for signs of wear or damage, such as lifting edges or color fading, and address them promptly.
Following these best practices keeps your wrapped vehicle looking fresh and extends its lifespan, ensuring you get the most out of your investment in vehicle wrapping.
Protecting the Wrap From Environmental Damage
Preserving your vehicle’s wrap from environmental harm helps keep it bright and secure for an extended period. Proper upkeep not only maintains the look but also prolongs the vinyl wrap’s durability. Here are functional measures to defend against environmental threats:
- Use shaded areas for parking your car, or apply a car cover when stationed outside. Continued exposure to sunlight can cause the vinyl to lose its colour.
- Frequent cleaning of your car with pre-installation cleaners made for wrapped vehicles is recommended. Stay clear of harsh chemicals.
- For drying your car after a wash, utilize a lint-free towel or cloth to keep scratches at bay on the vinyl surface.
- Every few months, apply a sealant particularly made for vinyl wraps to provide defense against UV rays, dirt, and minor scratches.
- Steer clear of using high-intensity pressure washing near the surface, as it might loosen the wrap’s edges.
- Opt for hand washing with alcohol-based cleaning agents, avoiding automatic car washes that use rough brushes, which could harm the film.
- Periodic inspection of your wrap for signs of wear or peeling is critical, particularly after being subjected to extreme weather conditions.
- Deal with any stains or spills promptly to stop them from penetrating the vinyl and causing irreversible discolouration.
- Desist from applying wax on matte or textured wraps as it might modify their looks; always verify product guidelines first.
- Contemplate separately tinting tail lights and other exposed parts to ensure consistent protection across all vehicle areas wrapped in vinyl.
- The application of sun control film on windows could lower interior temperatures and lessen the fading of interior sections of the wrap due to UV exposure.
Each action taken in preserving your vehicle’s wrap from environmental harm not only sustains its aesthetic allure but also secures your monetary input in improving your car’s look-through wrapping.
Regular Inspection: Spotting and Fixing Minor Issues Early
Keeping your car wrap from environmental harm is essential. Subsequently, frequent checks guarantee that your vehicle’s wrap retains its impeccable state.
- Plan a monthly examination of the wrap. This aids in identifying and resolving minor issues before they escalate into severe problems.
- Utilize a clean, lint-free cloth during assessments. This wards off any extra scratches or impairment to the vinyl surface.
- Spot indications of peeling at the edges or corners of the film. Early detection paves the way for swift repairs, ensuring the wrap stays complete.
- Inspect for colour alterations or fading in zones exposed to direct sunlight. This is a sign that it’s time to think about refreshing the wrap or applying safeguarding coatings.
- Opt for alcohol-based cleaners to eliminate pre-installation cleaning product residue spots identified during the inspection. They eradicate residues without damaging the vinyl.
- Touch the surface with your hand for any rough spots that might signal trapped grime or debris under the vinyl.
- Scrutinize areas around door handles and mirrors with extra attention since these locations are susceptible to wear and tear.
- Verify all tint tail lights are devoid of bubbles or creases, denoting proper adhesion in these intricate sections.
- Visually inspect for air bubbles by viewing the wrap at an angle under proper lighting; employ a squeegee to flatten them if discovered gently.
- If you detect substantial damages, seek advice from a professional installer regarding whether it’s preferable to mend or substitute sections of the wrap.
Performing frequent examinations on your vehicle assists in maintaining its aesthetic appeal. Also, it prolongs the lifespan of the car wrap significantly, making sure you reap maximum benefits from your investment in vehicle customization and protection.
Conclusion
Wrapping your vehicle can transform its appearance and protect its surface. With the right equipment, such as a lint-free towel, pre-installation cleaning products, and alcohol-based cleaners, DIY installation becomes a viable option for many. Anyone can learn to install a wrap with a lot of patience and the right information.
This process involves cleaning the car thoroughly before applying vinyl to ensure that no objects stick to the car during installation. The first step is to make sure the surface is completely dry, as this ensures better adhesion and a seamless finish. It’s essential to measure and cut the vinyl accurately and then carefully place the vinyl on the vehicle. If adjustments are needed, you can simply lift and reapply the film.
One of the most common reasons for wrapping is a color change, which gives the vehicle a fresh, unique look. When considering a new wrap, many people find themselves asking about the car wrapping cost in Coimbatore, which can vary based on the size of the vehicle and the type of vinyl used.
Maintaining a wrapped car requires proper care. Use clean, lint-free cloths for cleaning, and keep an eye out for minor issues early on. Protecting your wrap from environmental damage extends its life and keeps your vehicle looking great for longer.
Installing vinyl takes time, but the results speak for themselves. It’s a process you can trust if done right, and for those with a question about whether it’s worth it—the answer lies in the eye-catching, lasting impression a good wrap delivers.


