How to Fix Air Bubbles in Your Car Wrap: Simple and Effective Tips
If your car’s appearance matters to you, seeing air bubbles pop up under the vinyl wrap can be frustrating. These pesky little bubbles ruin the sleek look of your vehicle. Luckily, knowing how to fix bubbles in car wrap is easier than you might think.
Air bubbles form during vinyl wrap installation due to trapped air or moisture. We’ll lead you through a few simple steps to get those unsightly Side bubbles during vinyl wrap application out and leave your car looking smooth.
With our guide to Wrapping Your Car with Style, removing vinyl wrap bubbles will be a breeze. Keep reading for bubble-free results!
What Causes Air Bubbles in Vinyl Wrap?
Air bubbles in vinyl wrap usually surface from captured air during the implementation stage. This often occurs if the surface isn’t prepared correctly or when the vinyl isn’t applied consistently.
Minute dust, dirt, or even small moisture particles can interfere with the vinyl’s ability to adhere to the car’s surface smoothly. These irregularities generate gaps where the air gets trapped beneath the vinyl film, resulting in noticeable bubbles.
A frequent cause is also related to errors made during the stretching and applying of the wrap. Vinyl requires careful management; overstretching or under stretching can cause wrinkles that trap air pockets.
Moreover, neglecting to use proper tools like a squeegee to press out air during the process effectively may leave tiny air bubbles beneath your wrap. Issues related to moisture and adhesive also contribute significantly.
For instance, humidity on the car’s surface or the use of insufficient adhesive creates an environment conducive to bubble formation, leading to small bubbles in your vinyl wrap.
Understanding the Trapped Air Problem
Air pockets trapped beneath a vinyl car wrap manifest as visible blemishes, disrupting the sleek aesthetic of your vehicle. These bubbles form when the vinyl does not adhere adequately to the vehicle’s exterior during the application.
Putting the wrap on without maintaining ideal conditions may result in trapped air or dirt, causing these undesirable uneven spots across the wrapped area. This problem impacts both the appearance and the durability of the wrap.
Applying heat and pressure is vital for adequately securing vinyl wraps; without them, stopping bubble formation proves difficult.
Eliminating bubbles from vinyl is essential for overall attractiveness and lasting quality.
The quality of the vinyl wrapping also has a considerable impact. High-grade vinyl wrap, being pliable when warmed, facilitates a more accessible release of trapped air. Errors during application often happen due to hastening the process or failing to control external factors such as temperature and cleanliness of the setting.
Furthermore, common missteps elucidate how incorrect techniques can exacerbate this issue, pointing out aspects that need vigilant oversight during application.
Common Mistakes During Vinyl Wrap Installation
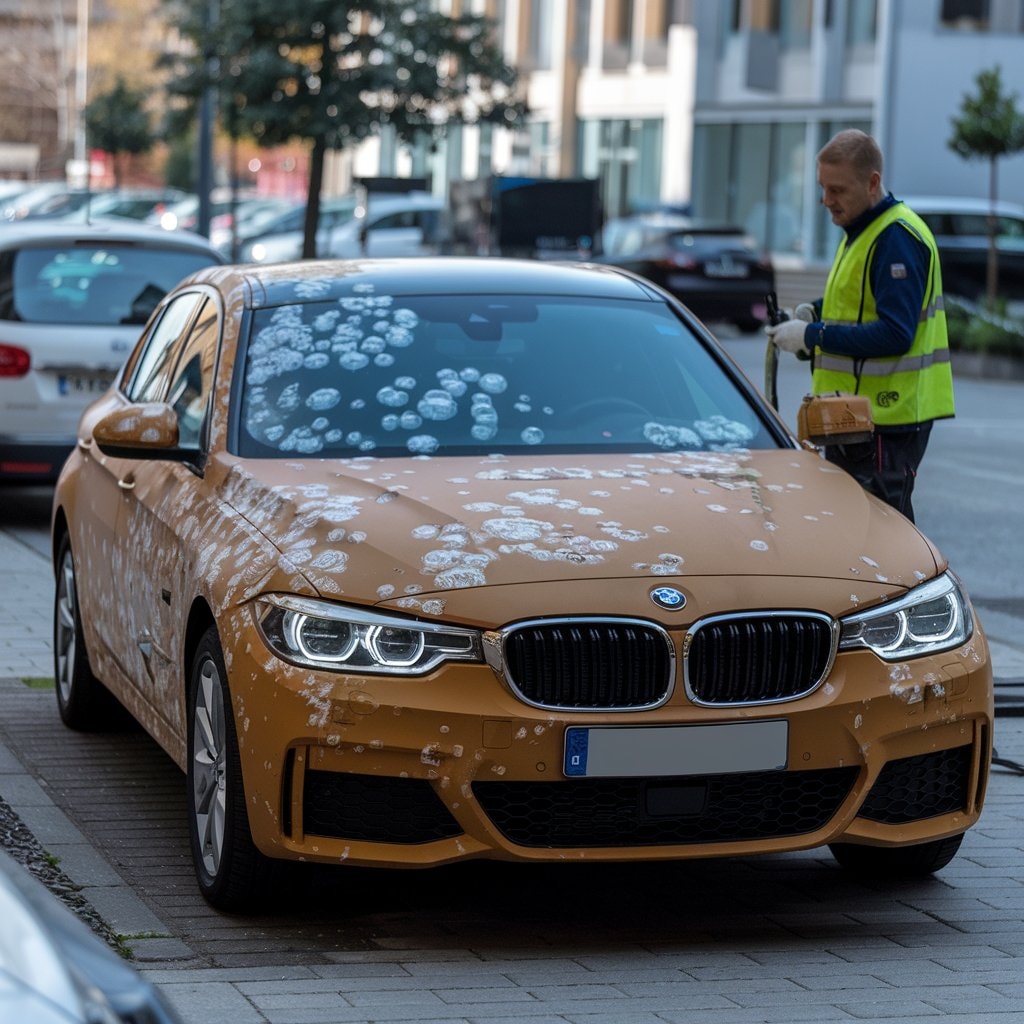
One common mistake during vinyl wrap installation is not cleaning the surface properly before applying the wrap. Dirt and dust trapped under the vinyl can cause small air bubbles and unevenness, ruining the smooth look of your car’s exterior.
Another frequent error is failing to remove all air bubbles from the vinyl wrap during application. Even tiny pin-sized bubbles will eventually grow more extensive, affecting both appearance and durability.
Using too much heat or stretching the vinyl excessively are also mistakes that can distort or damage the material. A heat gun should be used with care to soften but not melt the vinyl, allowing it to stretch just enough to fit without creating stress lines or tears.
Avoiding these pitfalls ensures a sleek, bubble-free finish that enhances your vehicle’s aesthetics while protecting its paintwork against everyday wear and tear. For added durability, consider options that offer car wrap rust protection, helping shield your vehicle from environmental damage while maintaining its fresh appearance.
The Role of Moisture and Adhesive Issues
Moisture plays a significant role in causing bubbles in your vinyl wrap. When water gets trapped under the vinyl, it stops the adhesive from sticking properly. This can happen if you apply the wrap on a damp day or if the surface isn’t arid.
The moisture then turns into air pockets that create those annoying, unwanted bubbles.
Adhesive issues also contribute to bubble formation. If the adhesive on the vinyl isn’t high-quality or is applied unevenly, it won’t stick smoothly to your car’s surface. Sometimes, reusing old vinyl or shrink wrap leads to weak adhesive bonds and more bubbles out of your vinyl, ruining its appearance and diminishing protection against environmental damage.
To prevent these problems, always choose fresh premium wraps and make sure your car’s surface is clean and dry before application.
How to Get Bubbles Out of Vinyl Wrap?
Modifying vinyl wrap bubbles is straightforward once you’re familiar with the necessary steps. These practical solutions can optimize the visual appeal of your car wraps, rendering them fresh-looking and seamless.
- Warm up the vinyl gently with a hair dryer or a heat gun. This renders the material flexible and more manageable. Keep a careful watch over the heat output to avoid the risk of damage to the wrap.
- Depress the bubble with your finger. Start at the center and move in an outward direction. This method results in the air being pushed to the edges, flattening the bubble.
- Utilize a squeegee to even out larger expanses. Move it steadily across the surface to dispel the air bubbles in the vinyl.
- If bubbles persist, use the pin method: make a petite perforation with a pin or needle at one end of the bubble. Ensure it’s tiny to prevent ripping.
- Apply gentle pressure around the perforation. Push air bubbles from your vinyl wrap in this direction, letting the air escape without causing damage to the wrap.
- For more challenging areas, mildly reheat the vinyl wrap and carefully adjust it around bends and edges to eliminate bends that might trap air.
- Refrain from excessively stretching the wrap as it might lead to distortion or diminish its adhesive properties.
- Make sure to clean the surface thoroughly before applying any wrap to avoid the risk of debris causing bumps under your new film.
- Ensure an even distribution of pressure when attaching new parts of the wrap to forestall the formation of air bubbles in your vinyl.
- Use top-notch materials such as prime vinyl wrap which are less likely to form bubbles due to superior adhesive technologies and material uniformity.
Then, we’ll study how averting these complications can further boost your vehicle’s visual appeal.
Using a Heat Gun or Hair Dryer
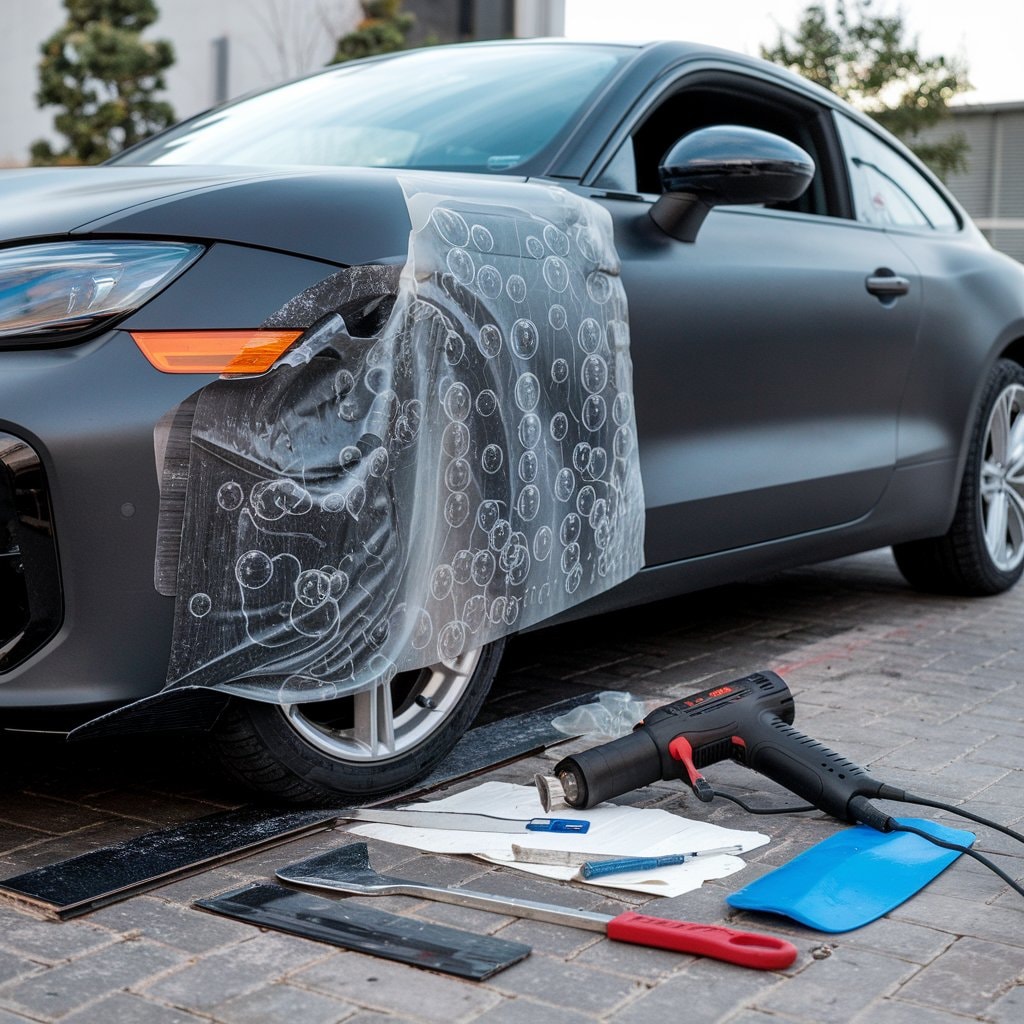
Applying a heat gun or hair dryer works well as a technique to fix vinyl wrap bubbles. Warm the vinyl wrap carefully with these tools before applying pressure to smooth out the air bubbles.
The heat makes the vinyl more pliable, allowing you to press and stretch the material gently without tearing it. This method helps remove even the most minor air pockets, ensuring a sleek, bubble-free finish on your car.
Applying controlled heat can dramatically improve your ability to eliminate air bubbles from vinyl wraps.
Techniques with a Squeegee and Needle
After softening the vinyl with a heat gun or hairdryer, another effective technique involves using a squeegee and needle. This method helps remove air bubbles from vinyl efficiently.
You start by gently pushing bubbles to the edge of the wrap with a squeegee. This tool is perfect for tiny bubbles and pressing down on the vinyl without causing damage.
For stubborn bubbles that won’t push out, carefully Prick a tiny hole with a needle in the center of each bubble. Then press down on the vinyl around these tiny pin holes to let trapped air escape.
This approach ensures your car wrap looks smooth and professional without stretching the wrap too much. Working from the center and moving toward the edges can prevent new bubbles from forming during this process.
When to Press the Vinyl and Stretch It
Moving from techniques involving a squeegee and needle, it becomes crucial to understand the timing and method for pressing and stretching the vinyl wrap. Pressing the button to remove the vinyl wrap bubbles helps eliminate any smaller bubbles left behind, ensuring a smoother surface.
This step is essential after applying initial pressure with tools but before finalizing the wrap’s placement on your car or bike. Effective pressing allows air out toward the edges of vehicle wraps, preventing future problems and improving adhesion.
Stretching the vinyl comes into play when fitting it around curves or corners of your vehicle. To make it more pliable and easier to work with, gently heat the vinyl using a heat gun at optimal temperature settings.
This process softens the vinyl, allowing for a tight fit without creases or wrinkles. Apply pressure evenly as you stretch and smooth down the film to avoid stretching the wrap too much, which can lead to thinning or tearing of your premium vinyl wrap.
Can You Prevent Air Bubbles in Your Car Wrap?
Avoiding air pockets in your car wrap can be accomplished through meticulous preparation and suitable methods. The role of high-grade vinyl is paramount, as superior materials tend to trap less air during the installation process.
Prior to adding the wrap to your car, the surface must be clean and dirt-free, as this has a significant impact. Dirt particles often create small bumps that evolve into bubbles beneath the wrap.
Installing vinyl wraps demands accuracy to sidestep typical issues leading to bubble formation. Utilizing a squeegee assists in leveling the vinyl and directing any air trapped inside the material toward the perimeter, permitting it to be forced to exit.
Carefully heating the vinyl with a heat gun gives it more adaptability, simplifying the process of molding it onto curves without folds or bubbles. It’s not merely important to concentrate on the method itself, but also on external factors like temperature and humidity levels that affect the effectiveness wrap’s adhesive bonding to your car’s paint.
Importance of High-Quality Vinyl
Selecting superior-grade vinyl for your car wrap is fundamental in warding off air bubbles and improving your vehicle’s aesthetic. High-tier vinyl, such as Tec wrap or 3M metro wrap, is engineered to be more adaptable, facilitating a seamless application process. Before choosing any wrap, it’s wise to weigh the pros and cons of wrapping to ensure it aligns with your goals for durability, appearance, and maintenance.
This type of material assures a fresh vinyl look for your car without jeopardizing the paint, while also reducing the possibility of moisture and dirt getting trapped underneath – typical causes of air bubbles.
Avoid bubbles by going for top-grade vinyl; it’s an excellent method to award your car an attractive new look.
In addition, employing high-quality vinyl prolongs your car wrap’s life. It endures higher temperatures more efficiently during application and stays intact over time, unlike lesser-grade materials that may permit dirt intrusion or rapidly lose their allure.
By choosing quality vinyl initially, you avert regular reapplications, save on long-term costs, keep corrosion at arm’s length, and retain control over the required heat output for effective vinyl softening during installation.
Steps for Preventing Air Bubbles During Application
Ensuring a bubble-free application when applying vinyl wrap to your car is vital for achieving a smooth finish. Here’s what you can do to make your car wrap look professional and free from bubbles:
- Thoroughly clean the surface. Removing all dirt and grease can help the vinyl adhere better, consequently reducing the chance of bubbles forming. A dedicated cleaning solution is ideal for this task.
- Choose superior-quality vinyl. High-quality materials are less susceptible to bubbling and simplify the wrapping process, thereby providing an excellent customized appearance without damaging your car’s paint.
- Measure and cut with precision. Precise measurements ensure easier adjustments of the vinyl wrap, reducing the chances of air pockets during the application process.
- Apply under ideal conditions. The temperature should be neither too hot nor too cold, as it can influence the effectiveness of the adhesive and the flexibility of the vinyl.
- Use a squeegee effectively. Begin from the center and gradually move outwards, applying consistent yet gentle pressure to push any trapped air to the corners of the wrap.
- Apply heat judiciously when required. A heat gun or hairdryer can help enhance the flexibility of the vinyl, enabling it to be stretched over curved surfaces without air getting trapped beneath.
- Use a pin to remove persistent bubbles if they occur post-application. This technique is safe and is not likely to damage the paint or leave any marks if executed with caution.
- Avoid overstretching around edges where the vinyl can accumulate. Instead, concentrate on evenly smoothing it down without excessive pulling.
By following these steps, you can avoid bubbles from developing and ensure the wrap fits seamlessly around your vehicle, producing a polished appearance.
How to Prevent Bubbles by Avoiding Common Pitfalls
Preventing air bubbles in vinyl wrap starts with understanding common challenges and adopting the proper technique. Practical techniques and planning ahead can make the wrapping process go smoothly, ensuring a bubble-free finish.
- Choose high-quality vinyl for wrapping your vehicle. This step is crucial because superior quality material is less likely to form bubbles and is easier to work with during application.
- Ensure the surface of the car is spotless before you start. Dust, dirt, or moisture trapped under the vinyl wrap can cause bubbles, so cleaning it thoroughly will help avoid this issue.
- Measure carefully and cut your vinyl wrap with precision. Proper sizing prevents the need for excessive stretching that might let air get trapped under the film.
- Apply the vinyl slowly and use a squeegee to push out air pockets as they form. Starting from the center and working your way out allows you to maintain control over bubble prevention.
- Use a heat gun or softening dryer to facilitate easier manipulation of the vinyl around curves and edges without wrinkling or bubbling up.
- Overstretching the vinyl can cause failure; therefore, stretch only as needed while heating evenly ensures that it lays flat against all surfaces without bubbling.
- After applying, check for any overlooked areas where bubbles might have formed and address them promptly by puncturing them with a pin and then smoothing out the area with a squeegee.
- Letting the vehicle rest after installation helps any minor bubbles disappear on their own as vinyl settles into place, often softening minor imperfections out overnight, further preventing vinyl wrap bubbles.
Choosing between effective tools like pins or heat guns wisely based on what part of the process you’re in enables better control over outcomes—deciding carefully ensures removal when necessary but also aids in applying heat precisely where needed for smoothing purposes.
What Tools Do You Need to Remove Air Bubbles?
Removing air bubbles from vinyl wrap requires a few essential tools. A pin or needle helps you gently pierce the bubble, allowing trapped air to escape without ruining the rest of your wrap.
For larger areas, using a heat gun or hairdryer can soften the vinyl, making it easier to smooth out wrinkles and bubbles with your fingers or a squeegee. The control over the heat output is crucial; getting the wrap hot enough softens it for manipulation but won’t harm the paint on your car.
Applying just enough heat makes vinyl flexible enough for bubble-free application.
Another handy tool is a squeegee, which plays a vital role in initially applying vinyl wraps and can also help work your way around after heating to remove vinyl wrap bubbles. This method goes smoothly when you use consistent pressure across the surface of your vehicle’s top, preventing new bubbles from forming and ensuring no future issues arise.
Essential Vinyl Wrap Tools for Beginners
For beginners aiming to fix bubbles in vinyl wrap and make their cars look stunning, having the right tools is crucial. A squeegee helps smooth out the film and remove air pockets, ensuring a sleek finish.
A heat gun or hair dryer becomes indispensable when you need to stretch the vinyl wrap around curves and edges, letting you work your way through tricky spots without leaving marks.
A pin or needle proves handy for popping trapped air bubbles without damaging the vehicle’s paint. These essential yet effective tools are crucial for anyone looking to give their car a great new look without running into common pitfalls that might let dirt under the wrap or create unsightly blemishes.
Pin or Heat Gun: Making the Right Choice
Choosing between a pin or heat gun for removing tiny air bubbles from your car’s vinyl wrap is significant. A pin works well for tiny, isolated bubbles. You poke them and press the air out gently.
Using this method doesn’t risk damaging the paint beneath, and it provides accurate control over bubble removal. Alternatively, a heat gun is useful for managing larger areas of trapped air – it warms up the vinyl, allowing it to be more flexible so you can push the air to the edges.
Both tools play critical roles in ensuring a smooth finish but need careful handling to avoid damage to the vinyl.
The effective use of these tools is about acknowledging their strengths and weaknesses. Pins provide accuracy for minor faults, while heat guns are more appropriate for more extensive corrections.
Consistently ensure a moderate pressure application with both methods to maintain your car’s immaculate look and avoid unnecessary damage. Knowledge of these tools enhances the ability of car owners and enthusiasts to keep their vehicle’s appearance at its optimal condition.
How Does Fixing Bubbles Out of Vinyl Improve Your Car’s Appearance?
Fixing bubbles out of vinyl significantly enhances your car’s appearance. Bubbles can ruin the sleek look of a wrap, making it appear unprofessionally done and poorly maintained. A smooth, bubble-free vinyl film is critical to achieving that flawless finish every car owner desires.
This process ensures your vehicle stands out for its clean lines and sharp aesthetics.
A bubble-free wrap also protects the integrity of your car’s paint beneath. Vinyl appropriately applied, without any air pockets, acts as a shield against environmental damage and everyday wear.
It makes the wrap more durable and less likely to harm the paint over time. Plus, removing bubbles increases the chance you can reuse the wrap, offering another way to give your car a fresh look while being cost-effective.
Impact of Vinyl Wrap Bubbles on Car’s Appearance
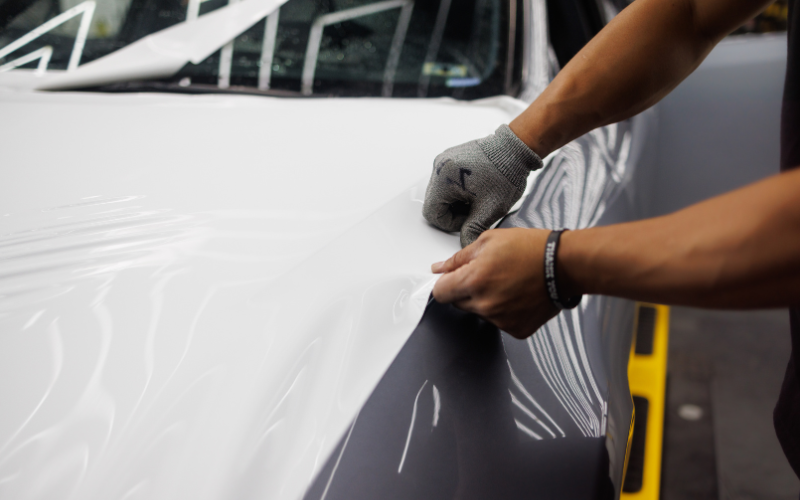
Air pockets, or “vinyl wrap bubbles,” can noticeably alter a car’s outlook, rendering it seemingly poorly managed. These minor air traps occurring between the vinyl layer and the vehicle surface can sabotage the desired sleek and even finish.
Not only are bubbles visibly detectable, but they also can demonstrate an impression of a hurried or amateurish installation. Although these bubbles pose minimal risk to the paint directly under normal circumstances, they do, undoubtedly, impact the overall visual appeal of the vehicle.
Ensuring a bubble-free vinyl film is essential to preserving the appealing look of your car. A well-executed wrapper task appears flawlessly integrated, significantly upgrading the visual charm of the vehicle – all while offering security and a unique style for your ride.
Removing these flaws confirms that your car not only looks prime but also speaks volumes about you as an owner, exhibiting careful observation and satisfaction in your vehicle’s maintenance.
Benefits of a Bubble-Free Vinyl Film
A bubble-free vinyl film boosts your car’s overall look, making it gleam as if freshly painted. This flawless appearance is a great way to give your vehicle a new lease on life without the high cost of a traditional paint job.
Cars with perfect wraps are more appealing, helping them stand out in a crowd.
Removing bubbles from the wrap also ensures the vinyl stays intact longer. A smooth surface is less likely to tear or peel, meaning you won’t have to redo the job anytime soon. This durability saves money and keeps your car looking its best for years.
Driving a visually stunning car increases its resale value, proving that investing time in getting rid of bubbles pays off in more ways than one.
Conclusion
Rectifying bubbles in your car’s vinyl wrap improves its visual appeal and also preserves the longevity of the underlying paint. A smooth, free-from-bubble finish gives your vehicle a maintained appearance and can boost its overall value.
Gaining proficiency in the methods to extract air pockets and avert their occurrence, in the beginning, is a worthy skill for car admirers and proprietors alike. You’ll discover, with practice, that these bubbles can be conveniently removed, letting your car gleam devoid of unpleasant defects.
Staying informed with guidance on preserving an impeccable vinyl wrap would assist in shielding your investment eventually. Whether it is the appropriate use of a heat gun or hairdryer or commencing with superior vinyl, every step taken aids in a more impressive and long-lasting wrap.
Keeping this information at hand will let you savor a flawless-looking vehicle that is less likely to damage the paint beneath, ensuring contentment with every journey.


